Introduction
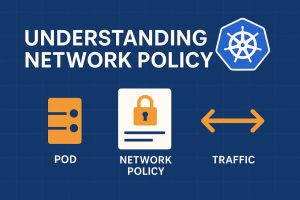
Network Policy in kubernetes are a critical part of securing containerized applications running in Kubernetes clusters. They control how pods communicate with each other and with external services, ensuring your microservices remain isolated and protected. Kubernetes has revolutionized container orchestration, enabling scalable and efficient deployment of modern applications. But with power comes responsibility—especially when it comes to security.
By default, Network policy in kubernetes allows unrestricted communication between pods, which can lead to security vulnerabilities. This is where Kubernetes Network Policies come in. Network Policies are like virtual firewalls at the pod level, enabling fine-grained control over traffic in and out of your Kubernetes workloads.
What are Network Policy in Kubernetes?
Network Policies are Kubernetes resources that control the network traffic flow between pods and external endpoints. They allow you to define:
-
Which pods can communicate with other pods
-
What external IPs a pod can connect to
-
Whether a pod is allowed to receive or send traffic
-
Ingress (incoming) and egress (outgoing) rules
If you’re familiar with traditional firewalls or VPC security groups, think of Network Policies as their Kubernetes-native version
The Default Behavior network policy in kubernetes
By default, all pods in a Kubernetes cluster can talk to each other without restrictions. That means a compromised pod can:
-
Access any microservice
-
Connect to sensitive workloads like databases or APIs
-
Move laterally through the cluster
This is not acceptable in production environments.
Network Policies give you control — they allow only specific traffic while denying everything else.
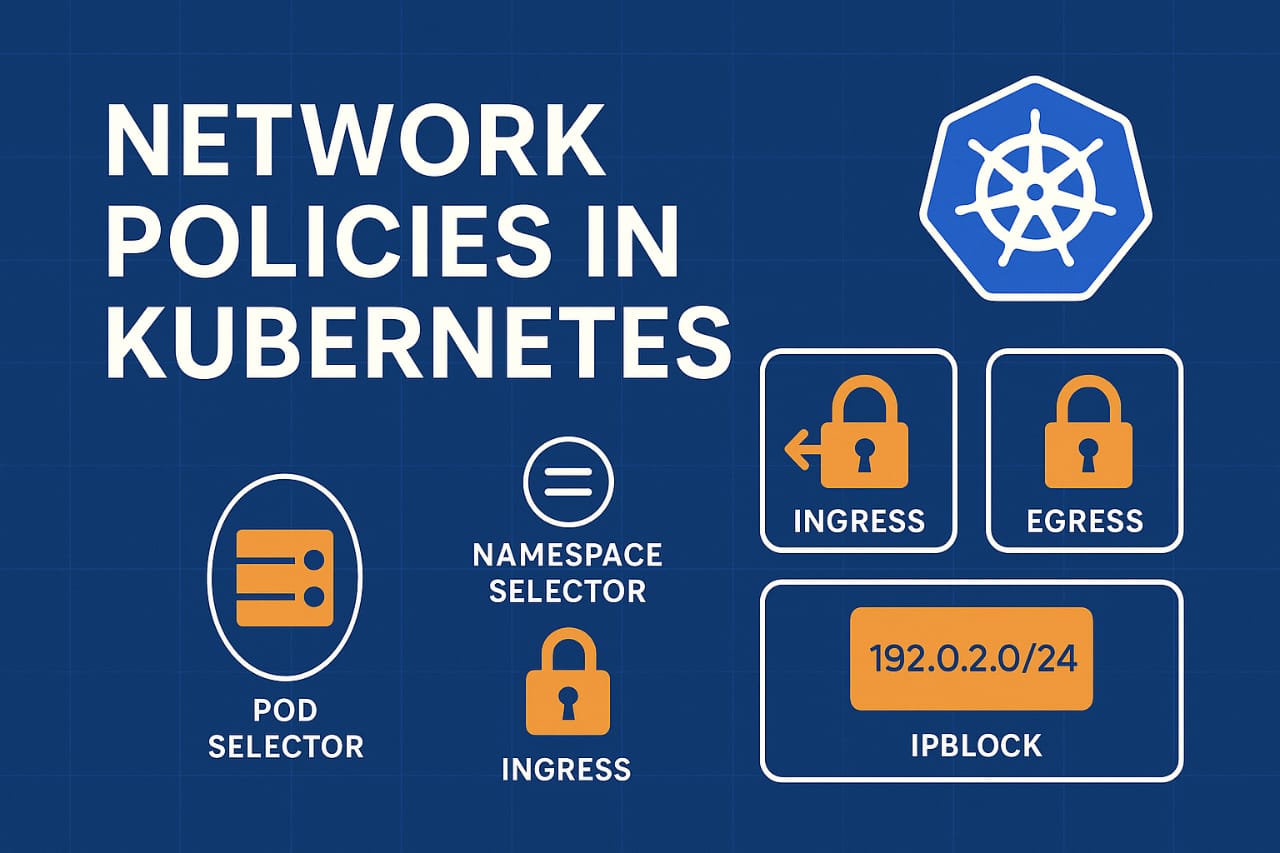
How Do Network Policy in kubernetes Work?
Network Policy in kubernetes are defined using the NetworkPolicy object in Kubernetes. Here’s how they work:
-
They target a group of pods using
podSelector. -
They define Ingress rules to control incoming traffic.
-
They define Egress rules to control outgoing traffic.
-
You can match traffic using:
-
Pod selectors
-
Namespace selectors
-
IP blocks
-
-
The frontend pod is allowed to access the backend pod. YAML Examples of Network Policies
1. Deny All Traffic by Default
This is often your starting point — deny everything, then allow only what’s needed.
apiVersion: networking.k8s.io/v1

kind: NetworkPolicy

metadata:

name: deny-all

namespace: default

spec:

podSelector: {}

policyTypes:

- Ingress

- Egress
This policy applies to all pods in the namespace and blocks all traffic in both directions.
2. Allow Ingress from Specific Pods
Let’s allow only the frontend app to access the backend.
apiVersion: networking.k8s.io/v1

kind: NetworkPolicy

metadata:

name: allow-frontend-access

namespace: default

spec:

podSelector:

matchLabels:

role: backend

ingress:

- from:

- podSelector:

matchLabels:

role: frontend
This allows only traffic from pods with role: frontend to reach pods with role: backend.
3. Allow Egress to External Services (e.g., DNS or Payment Gateway)
apiVersion: networking.k8s.io/v1

kind: NetworkPolicy

metadata:

name: allow-google-dns

namespace: default

spec:

podSelector:

matchLabels:

app: dns-client

policyTypes:

- Egress

egress:

- to:

- ipBlock:

cidr: 8.8.8.8/32
This allows the dns-client pod to talk to Google DNS (8.8.8.8), and nothing else externally.
Best Practices for Using Network Policy in Kubernetes
1. Start with a deny-all baseline
Let nothing in or out by default, then open only what’s needed.
2. Use labels wisely
Group your pods logically (role: frontend, env: prod) so policies are easy to write and maintain.
3. Isolate sensitive components
Never allow unrestricted access to services like:
-
Databases
-
Admin APIs
-
Internal event queues
4. Test in staging first
Misconfigured policies can block legitimate traffic. Always test in non-prod environments first.
5. Use observability tools
Visual tools like Calico UI or Cilium Hubble help debug and monitor traffic.
Real-World Use Cases
1. Healthcare App
Allow traffic only between frontend and patient-record microservice. Block all others.
2. Fintech App
Only allow access to transaction pods from payment gateway pods. Block developer pods or dashboards.
3. Staging Environment
Simulate a breach scenario by only allowing limited pod-to-pod communication.
4. Zero Trust Architecture
Use Network Policies to build a “trust nothing, allow only what’s necessary” model.
Benefits of Network Policies in Kubernetes
1. Enhanced Security (Zero Trust Networking)
Network Policies help enforce zero-trust architecture within your Kubernetes cluster by:
-
Denying all communication by default
-
Allowing only explicitly defined traffic
-
Preventing unauthorized pod-to-pod communication
This helps reduce the attack surface and contain threats inside the cluster.
2. Pod-Level Traffic Control
You can define fine-grained rules based on:
-
Pod labels
-
Namespace selectors
-
IP blocks
-
Ingress and egress rules
This allows you to control exactly who can talk to whom, and where they can go.
3. Isolation Between Microservices
Helps isolate critical microservices like:
-
Databases
-
Admin APIs
-
Authentication services
Reduces the risk of internal data breaches and unauthorized access.
4. Restrict External Access
Use egress policies to:
-
Block access to the internet
-
Only allow specific IPs (e.g., payment gateways, DNS servers)
-
Prevent data exfiltration
Great for security and compliance (e.g., HIPAA, PCI-DSS).
5. Test Real-World Scenarios
You can simulate real-world traffic restrictions in staging or testing environments using Network Policies. Useful for:
-
Penetration testing
-
Security drills
-
Failure simulations
Conclusion
Network Policy in kubernetes are one of the most powerful and underused tools in Kubernetes. They allow you to lock down traffic, prevent lateral movement, and build a secure, zero-trust cluster.
If you’re deploying anything sensitive in network policy in Kubernetes — APIs, databases, microservices — you should absolutely be using Network Policy.
Secure by default.
Allow only what’s needed.
Scale with confidence.
To learn more about securing click here